Are you in your forever home? Do any of us really know? We thought we were.... but then our boys moved out and now our 3rd child is about to turn 18 and she is chomping at the bit to leave home, so we have found ourselves with soon to be only two little girlies at home with us. We really do not need all the space in our current home. I do love our house but there is so much I want to do to it, $$$$$$ and too much space.
But someday when we do find ourselves in our forever home, I am going to utilize this AMAZING website!! The Handmade Home. Just look at this before and after!
They make it seem do-able. I will need my hubby though, lets hope he will be cooperative.
Maybe 2014 will be the year I get some projects done! What are your creative plans for the year?
Showing posts with label DIY. Show all posts
Thursday, January 9, 2014
Sunday, August 4, 2013
If this isn't the cutest idea ever............
I met Becki from whippy cake at The Creative Connection a couple years ago, we traded products, my girls have super cute whippy cake hair accessories and she has a vintage ruffled Lollibag. I saw the cutest picture of her on my news feed for my Facebook page and went to check out her blog.
I read the jewelry board tutorial and it is such a great idea! If my life ever slows down I may have to do this. Maybe all my girls can help me build it for a homeschool lesson this winter.
Have a great Sunday!
I read the jewelry board tutorial and it is such a great idea! If my life ever slows down I may have to do this. Maybe all my girls can help me build it for a homeschool lesson this winter.
Have a great Sunday!
Thursday, August 1, 2013
a birthday party
HELLO......... Sophie's 6th birthday is coming up and she is really excited! She has been talking about it since her last birthday. At first she wanted a fishing themed party because she loves it when her daddy takes her fishing. She is obsessed. Unfortunately, all the fish in our lake died this spring with the late freezes, so there has not been one day of fishing this year. I think she has forgotten about her fishing party.
Now she wants a Barbie party. Ugh, how many of those have I given my 3 girls? Too many to count. In my mind I have the talents of Martha Stewart and I can see exactly how my house will be decorated. This is how I envision my daughters birthday parties.....
image from pinterest
All nice and cute with a table set up and an array of coordinating goodies, snacks, and décor......
image from pinterest
With a cake like this all pink and perfect and yummy and of course I whipped it up fresh............
image from pinterest
But in reality, when I plan parties, I surf etsy and I find all kinds of cute paper straws, cupcake holders, banners, napkins, place cards, goodie bags, etc.... and I add it all up and then decide to scrap the whole thing because the décor is costing as much as the gifts I have bought for her......and my party looks a bit like this.
Why is my daughter, who is turning 16, giving me that look? She has no party décor. I rarely even have matching candles. And there is my typical chocolate cake with chocolate frosting. At least it is from scratch with organic ingredients, right?
Oh sweet Portia, with her 4th birthday cake (she is 11 now), at least I tried with the decorating gel (before our healthy eating) and some pink sprinkles. I even had a '4' candle. There was no décor.
This was my best attempt yet. It's terrible, I know. But at least it was 2 tier and had ballerina decorations on it with some cupcakes and it was on my vintage cake stand, which I stupidly sold at a vintage sale.... This was for Sophie's 2nd birthday.
So I am really in need of some advice and help and actually any and everything you can tell me about having a cute little girls birthday party, without spending a lot of money.
I am going to attempt to make a scrap fabric garland and I do have some red and white paper straws. But I don't want to throw the typical commercial Barbie party, HOWEVER, I would consider a VINTAGE Barbie party. We do love vintage Barbie stuff.
So please, please send your advice, links, etsy shops, pinterest ideas, etc....I'd appreciate it so much and so would Sophie!
Now she wants a Barbie party. Ugh, how many of those have I given my 3 girls? Too many to count. In my mind I have the talents of Martha Stewart and I can see exactly how my house will be decorated. This is how I envision my daughters birthday parties.....
image from pinterest
All nice and cute with a table set up and an array of coordinating goodies, snacks, and décor......
image from pinterest
With a cake like this all pink and perfect and yummy and of course I whipped it up fresh............
image from pinterest
But in reality, when I plan parties, I surf etsy and I find all kinds of cute paper straws, cupcake holders, banners, napkins, place cards, goodie bags, etc.... and I add it all up and then decide to scrap the whole thing because the décor is costing as much as the gifts I have bought for her......and my party looks a bit like this.
Why is my daughter, who is turning 16, giving me that look? She has no party décor. I rarely even have matching candles. And there is my typical chocolate cake with chocolate frosting. At least it is from scratch with organic ingredients, right?
Oh sweet Portia, with her 4th birthday cake (she is 11 now), at least I tried with the decorating gel (before our healthy eating) and some pink sprinkles. I even had a '4' candle. There was no décor.
This was my best attempt yet. It's terrible, I know. But at least it was 2 tier and had ballerina decorations on it with some cupcakes and it was on my vintage cake stand, which I stupidly sold at a vintage sale.... This was for Sophie's 2nd birthday.
So I am really in need of some advice and help and actually any and everything you can tell me about having a cute little girls birthday party, without spending a lot of money.
I am going to attempt to make a scrap fabric garland and I do have some red and white paper straws. But I don't want to throw the typical commercial Barbie party, HOWEVER, I would consider a VINTAGE Barbie party. We do love vintage Barbie stuff.
So please, please send your advice, links, etsy shops, pinterest ideas, etc....I'd appreciate it so much and so would Sophie!
Tuesday, October 9, 2012
A couple things I bought at Junk Bonanza
A few weeks ago I went to Junk Bonanza, a lot of fun....VERY CROWDED. I think I'll not show up right away next time. Or wait, scratch that, because my first run through I found a couple things I noted in my mind. When I went back for them they were gone...
Next time I am just going to buy, buy, buy!
I ended up getting a peice of *PINK* base board, two pink shutters, an orange lower case 'r' and an old light.
I put the pink baseboard in my daughters room up by the ceiling. I was just going to have it be a cute accent peice. But then I was hanging her curtain rod and I noticed her curtains were very long and I had a brilliant idea!
I asked my husband to hang them right on the pink baseboard and I really love how it turned out.
The light from the window does not make for a very good picture, but here it is anyway. The curtains are from IKEA.
I put the pink shutters in my youngest daughters room along side her corner windows. I realized after my husband had them up that I had them upside down! He didn't want to switch them for me so there they stay, oh well.
Again the light is not really great, but hey, I am happy it is sunny out today!! The shutters are all chippy and old.
And here is my latest Lollibag.
Have a wonderful rest of the week!!!
Next time I am just going to buy, buy, buy!
I ended up getting a peice of *PINK* base board, two pink shutters, an orange lower case 'r' and an old light.
I put the pink baseboard in my daughters room up by the ceiling. I was just going to have it be a cute accent peice. But then I was hanging her curtain rod and I noticed her curtains were very long and I had a brilliant idea!
I asked my husband to hang them right on the pink baseboard and I really love how it turned out.
The light from the window does not make for a very good picture, but here it is anyway. The curtains are from IKEA.
I put the pink shutters in my youngest daughters room along side her corner windows. I realized after my husband had them up that I had them upside down! He didn't want to switch them for me so there they stay, oh well.
Again the light is not really great, but hey, I am happy it is sunny out today!! The shutters are all chippy and old.
And here is my latest Lollibag.
Have a wonderful rest of the week!!!
Saturday, September 8, 2012
1/2 bath redo
When my husband goes out of town for work, I usually redo something in the house, it's just easier that way. I have my own methods. Recently hubby (lucky guy) got to go to Australia, so I tackled the 1/2 bath. And when I say tackle, that is exactly what I mean. I have to take a running leap to tackle these 12ft. ceilings. It is beyond me why a person would need 12ft ceilings, I don't know what the builders of this house were thinking and we really didn't put much though into them being a problem..... until I ordered window coverings, we started paying to heat and cool that extra space, and I decided I wanted to paint!
My dad brought over his 10ft ladder for me to use. That sucker is heavy, I have never used so many muscles in my body. I had to constantly lift and turn the ladder to reach the different walls, oh and I'm afraid of heights, oh and there is no room for a paint tray up there so up and down up and down I went. The bathroom is small so the ladder never fully extended and that was another issue but oh well. I got a good workout!
So here is the before picture, above... My plan was to stencil a really cool design over a dark color. I chose frosted plum for the base.
I really liked it at first.....
And then I got the whole room done and it was sooooo purple I was a bit worried.
But I knew the stencil would break it up a bit. I went to the store and got a cream color called wax figure or something. I put up my stencil and started.... and right away I knew this was not going to work. I mean, OH MY LANDS, this was not going to work. It was near impossible to balance myself atop a 10ft ladder while not getting excess stencil paint where it should not be, while the blue tape held it's stickiness, and not to mention the corners, this stencil did not want to go easy into the corners, and after the first two stencil area's and strings of not so nice words I was done.
I thought oh great! I cannot leave these walls all purple! So not to overdo the stripe theme, but what choice did I have??? I decided to put big stripes up and then I decided well lets do all different sizes of stripes then I won't have to be so "precise". Cuz let me tell you it was a good 20 degrees hotter at the top of that room and sweat was dripping off me and it's dark up there and I'm balancing and trying to get a straight line with my level, every couple feet I had to get down and lift and turn that ladder.
Sorry I'm whining so much.
So I taped up my stripes and painted the creamy color, and I got that done......and I don't have a picture of that color done, but this is why I do this when hubby is out of town... I HATED THE COLOR!
The cream just looked so dirty, I was going for a clean crisp look. Sigh. Back to Home Depot for the 3rd time, I picked up falling snow, a nice crisp white! I had to RE-TAPE the cream and start the stripes over. But I ended up loving this new white.
I had one more stripe in the cream color at the top of the walls and I said oh heck no, I ain't taping that sucker again!! So I purpled over the very top stripe.
Most importantly, my hubby like it! That was a relief. So he wasn't too upset when he found out I had ordered a new light that he had to install.
I had to take the picture with the light off, because it was so bright. When we took the old light down, there was so much dripped painted and lines, I had to sand the wall to paint so there would not be lumps.
So this was the project that never ended but in the end I am very happy with how it turned out! Now I need to find a gaudy white framed mirror and some decor. I am not sure what type of decor though.
Next week I am going to Junk Bonanza, so hopefully I will find something there!
My dad brought over his 10ft ladder for me to use. That sucker is heavy, I have never used so many muscles in my body. I had to constantly lift and turn the ladder to reach the different walls, oh and I'm afraid of heights, oh and there is no room for a paint tray up there so up and down up and down I went. The bathroom is small so the ladder never fully extended and that was another issue but oh well. I got a good workout!
So here is the before picture, above... My plan was to stencil a really cool design over a dark color. I chose frosted plum for the base.
I really liked it at first.....
And then I got the whole room done and it was sooooo purple I was a bit worried.
But I knew the stencil would break it up a bit. I went to the store and got a cream color called wax figure or something. I put up my stencil and started.... and right away I knew this was not going to work. I mean, OH MY LANDS, this was not going to work. It was near impossible to balance myself atop a 10ft ladder while not getting excess stencil paint where it should not be, while the blue tape held it's stickiness, and not to mention the corners, this stencil did not want to go easy into the corners, and after the first two stencil area's and strings of not so nice words I was done.
I thought oh great! I cannot leave these walls all purple! So not to overdo the stripe theme, but what choice did I have??? I decided to put big stripes up and then I decided well lets do all different sizes of stripes then I won't have to be so "precise". Cuz let me tell you it was a good 20 degrees hotter at the top of that room and sweat was dripping off me and it's dark up there and I'm balancing and trying to get a straight line with my level, every couple feet I had to get down and lift and turn that ladder.
Sorry I'm whining so much.
So I taped up my stripes and painted the creamy color, and I got that done......and I don't have a picture of that color done, but this is why I do this when hubby is out of town... I HATED THE COLOR!
The cream just looked so dirty, I was going for a clean crisp look. Sigh. Back to Home Depot for the 3rd time, I picked up falling snow, a nice crisp white! I had to RE-TAPE the cream and start the stripes over. But I ended up loving this new white.
I had one more stripe in the cream color at the top of the walls and I said oh heck no, I ain't taping that sucker again!! So I purpled over the very top stripe.
Most importantly, my hubby like it! That was a relief. So he wasn't too upset when he found out I had ordered a new light that he had to install.
I had to take the picture with the light off, because it was so bright. When we took the old light down, there was so much dripped painted and lines, I had to sand the wall to paint so there would not be lumps.
So this was the project that never ended but in the end I am very happy with how it turned out! Now I need to find a gaudy white framed mirror and some decor. I am not sure what type of decor though.
Next week I am going to Junk Bonanza, so hopefully I will find something there!
Wednesday, July 11, 2012
My DIY wall stripes!
So I started watching Craft Wars, it's "ok".... but on one show I saw a contestant, Mandi, and she had the cutest intro with a picture of a room she had redone. I loved it so much I looked up her blog and immediately went to work on her striped walls project.
I picked a small space, the hallway going to Sophie and Portia's rooms, but it was still overwhelming to me. But it turned out great and I love it!
My hallway before, Cottonballs by Benjamin Moore. Pretty boring.
A pretty small space, I thought it would be a snap. Maybe I should tell you I'm not really a details project person.
OH and you may find like I did, that your house was built without using a level! Not sure how the home builder did that, but I guess that's why he is no longer in business!
So you can see at the bottom of the above photo, you put on a coat of the current wall color first. I put that coat on to keep the gray from bleeding under the tape, that's what Mandi said to do, so I did it.
Here is my gray coat below.
AND.............................................. WA LLAH!! I love it! Don't you? So all the prep work was worth it. The blue tape took off some of my original paint when I took it off and in one area a huge chunk of the gray lifted too, but I will just touch it up.
I would love to paint the wall cabinet door a hot pink or a mustard yellow, however I don't think my husband would look to kindly on that!
So now that, that is done.... I may venture into another project. I may stencil a pattern in my half bath instead of wallpaper. It would be much cheaper, but again very time consuming. But I think I'll try.
So what do you think??
I picked a small space, the hallway going to Sophie and Portia's rooms, but it was still overwhelming to me. But it turned out great and I love it!
My hallway before, Cottonballs by Benjamin Moore. Pretty boring.
A pretty small space, I thought it would be a snap. Maybe I should tell you I'm not really a details project person.
All taped up, you can find detailed instructions at Mandi's blog. I followed them to a T. T is for tedious. But I know if this is going to look nice it takes time. First I took a level and drew lines 3 in. apart down the walls, that was the worst part I think. I hope I'm not discouraging you from trying this, I just didn't expect it to be so time consuming. I have a new found respect for people like Mandi who do this all the time and then photograph it and blog about it.
So you can see at the bottom of the above photo, you put on a coat of the current wall color first. I put that coat on to keep the gray from bleeding under the tape, that's what Mandi said to do, so I did it.
Here is my gray coat below.
AND.............................................. WA LLAH!! I love it! Don't you? So all the prep work was worth it. The blue tape took off some of my original paint when I took it off and in one area a huge chunk of the gray lifted too, but I will just touch it up.
I would love to paint the wall cabinet door a hot pink or a mustard yellow, however I don't think my husband would look to kindly on that!
So now that, that is done.... I may venture into another project. I may stencil a pattern in my half bath instead of wallpaper. It would be much cheaper, but again very time consuming. But I think I'll try.
So what do you think??
Monday, January 23, 2012
DIY homemade granola
I have always loved granola. My mom used to make it when she was in her "health kick" days, those days started when we lived in Arizona. She took a health food class and came home and bam! The next day we were drinking raw milk with chunks of cream floating in it, eating raw wheat germ on everything and making homemade granola! Looking back, it was kind of "hippyish" of my mom! I am so proud of her for doing that.
So maybe that is where my love of granola started.....I usually buy Cascadian Farms organic granola at Walmart, but it is almost $3.50 a box and I always buy more than one box, so it adds up rather quickly.
I found my mom's granola recipe, but to my surprise there is sugar in it! So I don't want to use that one. I found a recipe online but I changed it a lot, so I guess I'll call this my own.
Homemade Granola
3 C whole rolled oats
a little salt
1 tsp cinnamon
1/2 C organic pure maple syrup
1 C coconut flakes, I use Tropical Traditions coconut chips (so, so good)
1/2 C cold milled flax (I got it from Costco)
You may put a little agave nectar or honey in there if you like it sweet. If you do, you may want to use less maple syrup, you'll have to experiment.
Stir all ingredients together and put on a cookie sheet with sides. Bake at 300-325 for 15 min. Stir and bake another 10-15 min. After it is cool you may add raisins or whatever dried fruit if you like.
This is so easy and so yummy!
Thursday, January 5, 2012
DIY deoderant
I have always wanted to use a natural, not bad for you deoderant. I have tried all of the "natural" ones, they just plain don't work. I always have hope when I see a brand I haven't tried, but nope. So I was sure this homemade deoderant would just be another thing to add to my list of tried and failed.
Boy was I suprised! I kept smelling my pits all day, it really works! And you know those days you forget to apply deoderant and you stink? No problem for this deoderant.
Here is the recipe:
6 tablespoons organic coconut oil, I use Tropical Traditions
1/4 C organic cornstarch
1/4 C baking soda
Mix cornstarch and baking soda in a bowl. Then add coconut oil. With the back of a spoon mix ingredients together. Mix for several minutes until you have a very smooth mixture without any crumbling.
This makes quite a bit, I bought two small containers with lids and filled them with deoderant and gave one to my daughter. Apply it with your fingers.
I never have to buy deoderant again! Please let me know what you think!
Boy was I suprised! I kept smelling my pits all day, it really works! And you know those days you forget to apply deoderant and you stink? No problem for this deoderant.
Here is the recipe:
6 tablespoons organic coconut oil, I use Tropical Traditions
1/4 C organic cornstarch
1/4 C baking soda
Mix cornstarch and baking soda in a bowl. Then add coconut oil. With the back of a spoon mix ingredients together. Mix for several minutes until you have a very smooth mixture without any crumbling.
This makes quite a bit, I bought two small containers with lids and filled them with deoderant and gave one to my daughter. Apply it with your fingers.
I never have to buy deoderant again! Please let me know what you think!
Thursday, November 3, 2011
Devil's Food Layer Cake
My year has been so busy I have let Food Friday go by the wayside. Since Sunday I have had a fever and it's really weird, it's just a fever and I'm really tired. I am so tired of laying in bed that last night I made a dinner of meatloaf, leek and potato gratin (from Country Living) oh and I spent $12 on leeks! (oops, yes I went to target sick). And for dessert I made Devil's Food Layer Cake from my Williams-Sonoma cookbook Comfort Food. I LOVE this cookbook, it's a must have. I woke up still sick today, wondering how long this fever will last. My poor sister has had her fever since last Friday and her's is way worse then mine, close to 105 this morning. Please say a prayer for her.
Devil's Food Layer Cake
cake
Boiling water, 1 Cup
unsweetened natural cocoa powder, 3/4 Cup
all purpose flour, 1 3/4 Cup
baking soda, 1 1/2 t
salt, 1/4 t
sugar, 2 Cups
unsalted butter, 1/2 Cup plus 2 T at room temperature
large eggs, 3
vanilla extract, 1t
buttermilk, 1 1/4 Cups
frosting
confectioners' sugar, 3 3/4 Cups
unsweetened natural cocoa powder, 1 Cup
unsalted butter, 1/2 Cup, at room temperature
vanilla extract, 1t
heavy cream, about 1 Cup
To make the cake, preheat the oven to 350. Lightly butter two 9 in. round cake pans. Line the bottom of each pan with a round of parchment paper. Dust the pans with flour, tapping out the excess.
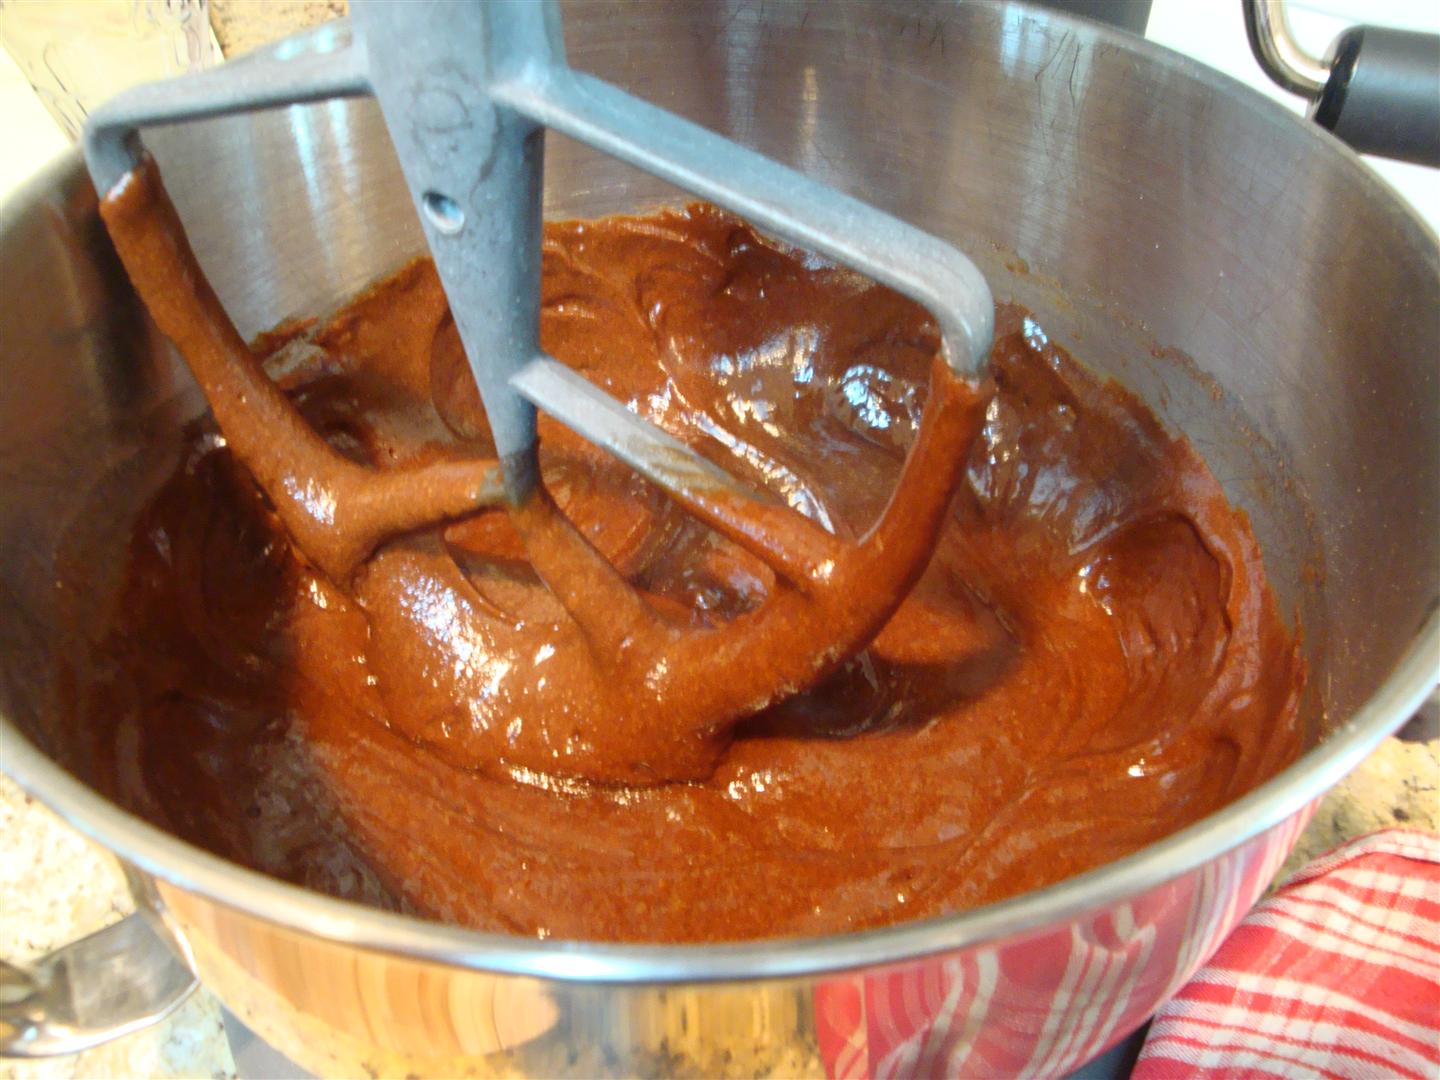
In a small heatproof bowl, whisk together the boiling water and cocoa powder until smooth. Let cool completely. In a bowl, sift together the flour, bakingsoda, and salt. In a large bowl, using a handheld mixer on medium high speed, beat together the sugar and butter until the mixture is light in color and texture, about 3 minutes. Beat in the eggs, one at a time, then beat in the vanilla and the cooled cocoa mixture. Reduce the speed to low and add the flour mixture in 3 additions alternately with the buttermilk in 2 additions, beginning and ending with the flour mixture and stopping to scrape down the bowl as needed, beating until smooth.
Divide the batter evenly between the prepared pans and smooth the tops. Bake the cakes until they begin to pull away from the sides of the pans, 35-40 minutes. Transfer to wire racks and let cool in the pans for 15 minutes. Run a knife around the inside of each pan to release cake. Invert the pans onto the racks, lift off the pans, and peel off the parchment paper. Turn each cake right side up and let cool completely.
To make frosting, in a bowl, sift together the confectioners' sugar and cocoa. Using the mixer on low speed, mix in the butter until it is crumbly. Mix in vanilla, and then gradually mix in enough of the cream to make a spreadable frosting.
Place 1 cake layer, bottom side up, on a cake plate. Using an icing spatula, spread the top of the layer with a generous 1/2 Cup of the frosting. Place the second layer, top side down on the top of the first layer. Frost the top, then the sides, with the remaining frosting. Slice the cake into thick wedges and serve.
This cake is so moist and delicious! And the frosting is like nothing I have ever made! It is amazing. Of course I don't feel the greatest so that will help me not devour the whole thing.
I have been watching nothing but food shows while in bed. I love food shows, and they are making me want to cook and bake!
And I am pooped again, so off to bed I go!
Devil's Food Layer Cake
cake
Boiling water, 1 Cup
unsweetened natural cocoa powder, 3/4 Cup
all purpose flour, 1 3/4 Cup
baking soda, 1 1/2 t
salt, 1/4 t
sugar, 2 Cups
unsalted butter, 1/2 Cup plus 2 T at room temperature
large eggs, 3
vanilla extract, 1t
buttermilk, 1 1/4 Cups
frosting
confectioners' sugar, 3 3/4 Cups
unsweetened natural cocoa powder, 1 Cup
unsalted butter, 1/2 Cup, at room temperature
vanilla extract, 1t
heavy cream, about 1 Cup
To make the cake, preheat the oven to 350. Lightly butter two 9 in. round cake pans. Line the bottom of each pan with a round of parchment paper. Dust the pans with flour, tapping out the excess.
In a small heatproof bowl, whisk together the boiling water and cocoa powder until smooth. Let cool completely. In a bowl, sift together the flour, bakingsoda, and salt. In a large bowl, using a handheld mixer on medium high speed, beat together the sugar and butter until the mixture is light in color and texture, about 3 minutes. Beat in the eggs, one at a time, then beat in the vanilla and the cooled cocoa mixture. Reduce the speed to low and add the flour mixture in 3 additions alternately with the buttermilk in 2 additions, beginning and ending with the flour mixture and stopping to scrape down the bowl as needed, beating until smooth.
Divide the batter evenly between the prepared pans and smooth the tops. Bake the cakes until they begin to pull away from the sides of the pans, 35-40 minutes. Transfer to wire racks and let cool in the pans for 15 minutes. Run a knife around the inside of each pan to release cake. Invert the pans onto the racks, lift off the pans, and peel off the parchment paper. Turn each cake right side up and let cool completely.
To make frosting, in a bowl, sift together the confectioners' sugar and cocoa. Using the mixer on low speed, mix in the butter until it is crumbly. Mix in vanilla, and then gradually mix in enough of the cream to make a spreadable frosting.
Place 1 cake layer, bottom side up, on a cake plate. Using an icing spatula, spread the top of the layer with a generous 1/2 Cup of the frosting. Place the second layer, top side down on the top of the first layer. Frost the top, then the sides, with the remaining frosting. Slice the cake into thick wedges and serve.
This cake is so moist and delicious! And the frosting is like nothing I have ever made! It is amazing. Of course I don't feel the greatest so that will help me not devour the whole thing.
I have been watching nothing but food shows while in bed. I love food shows, and they are making me want to cook and bake!
And I am pooped again, so off to bed I go!
Tuesday, August 23, 2011
Blueberry Scones with Lemon Glaze
I went shopping the other day with Lauren for school clothes. I noticed a Borders going out of business sale, so we went in and looked at the cookbooks. I found a Master Chef cookbook. I really love that show!
This is a recipe from that cookbook and it says: Recipe courtesy of Master Chef kitchen...
These are amazing! Really, be afraid, because you won't be able to stop eating these!
For the scones:
Unsalted butter, at room temperature for greasing the baking sheets
2 Cups all-purpose flour, plus more for dusting the blueberries
1 T baking powder
1/2 t fine salt
2 T sugar
5 T unsalted butter, cold, cut in chunks
1 Cup heavy cream, plus more for brushing the scones
1 Cup fresh blueberries
For the glaze:
1/4 Cup fresh lemon juice, about 2 lemons
1 1/2 Cups confectioners sugar, sifted
Zest of 1 lemon, finely grated
1 T unsalted butter
Preheat oven to 400. Lightly grease 2 baking sheets with butter.
Sift together the flour, baking powder, salt, and sugar. Using 2 forks or a pastry blender, cut in the butter to coat the pieces with the flour. The mixture should look like coarse crumbs. Make a well in the center and pour in the heavy cream. ( I had to use more than 1 cup of the cream)...Fold everything together just to incorporate. Do not overwork the dough. (my dough was very dry). Toss the blueberries in some flour-to help prevent them from sinking to the bottom of the scone when baked-then fold them into the batter. Take care not to mash or bruise the blueberries because their strong color will bleed into the dough.
Using an ice cream scoop or a tablespoon, drop mounds of batter onto the prepared baking sheets, about 2 inches apart to allow for spreading. Brush the scones lightly with cream. Bake for 15-18 minutes, or until lightly brown. Let the scones cool for at least 20 minutes before applying the glaze, or else it will not set.
Glaze: Mix the lemon juice and confectioners sugar together in a microwaveable bowl. Stir until the sugar dissolves. Add the lemon zest (I didn't use zest) and butter. Microwave on high power for 30 seconds. Whisk the glaze to smooth out any lumps, then drizle the glaze over the top of the scones. Let it set for 5 minutes. Store in a covered airtight container at room temperature for up to 3 days.
I put a second drizzle of the glaze on after the first one set... yum!
This is a recipe from that cookbook and it says: Recipe courtesy of Master Chef kitchen...
These are amazing! Really, be afraid, because you won't be able to stop eating these!
For the scones:
Unsalted butter, at room temperature for greasing the baking sheets
2 Cups all-purpose flour, plus more for dusting the blueberries
1 T baking powder
1/2 t fine salt
2 T sugar
5 T unsalted butter, cold, cut in chunks
1 Cup heavy cream, plus more for brushing the scones
1 Cup fresh blueberries
For the glaze:
1/4 Cup fresh lemon juice, about 2 lemons
1 1/2 Cups confectioners sugar, sifted
Zest of 1 lemon, finely grated
1 T unsalted butter
Preheat oven to 400. Lightly grease 2 baking sheets with butter.
Sift together the flour, baking powder, salt, and sugar. Using 2 forks or a pastry blender, cut in the butter to coat the pieces with the flour. The mixture should look like coarse crumbs. Make a well in the center and pour in the heavy cream. ( I had to use more than 1 cup of the cream)...Fold everything together just to incorporate. Do not overwork the dough. (my dough was very dry). Toss the blueberries in some flour-to help prevent them from sinking to the bottom of the scone when baked-then fold them into the batter. Take care not to mash or bruise the blueberries because their strong color will bleed into the dough.
Using an ice cream scoop or a tablespoon, drop mounds of batter onto the prepared baking sheets, about 2 inches apart to allow for spreading. Brush the scones lightly with cream. Bake for 15-18 minutes, or until lightly brown. Let the scones cool for at least 20 minutes before applying the glaze, or else it will not set.
Glaze: Mix the lemon juice and confectioners sugar together in a microwaveable bowl. Stir until the sugar dissolves. Add the lemon zest (I didn't use zest) and butter. Microwave on high power for 30 seconds. Whisk the glaze to smooth out any lumps, then drizle the glaze over the top of the scones. Let it set for 5 minutes. Store in a covered airtight container at room temperature for up to 3 days.
I put a second drizzle of the glaze on after the first one set... yum!
Wednesday, July 27, 2011
DIY...am I getting crafty??
I suppose I am a bit crafty, but not like your average crafty blogger. I have always wanted shopping bags for when I sell Lollibag's at shows. But I've checked online and they are expensive and you end up ordering thousands if you want to get the best price.
I have a thing for paper shopping bags. As a matter of fact I save all shopping bags and collect vintage paper products. I used to have a huge stack of shopping bags, but sometimes I look at the pile and think....Prudy! What ARE you doing? So currently I only have a few shopping bags, but don't worry, I plan on shopping in the near future.
Back to the subject at hand. I don't want to spend hundreds of dollars for shopping bag's for show's.... So I decided to take my shopping bags.................
And my vintage newspapers, a glue stick and a marker, and make new label's for my old bags.
It was actually fun. I didn't like cutting up the vintage newspaper, but I figured it was just sitting in a bin in my closet, so I might as well use it!
I can tell you exactly what I bought that was in these bags. Is that bad? This is the most darling bag from a store in Hawaii called Cinnamon Girl. Summer shirt.
Guess where that bag is from......
That was my retail therapy from Bare Escentuals. Blush and eye shadow.
White House Black Market. Really cute sandals with a bow across the front and wedge heels.
Nordstrom's. After going to IKEA with my sister we stopped to look at Clinique stuff and I walked out with this bag.
So you may not need shopping bags for customers, but you could do this for birthday's or Christmas too! Write whatever you like on the new label.
Come back and tell me what you make!
I have a thing for paper shopping bags. As a matter of fact I save all shopping bags and collect vintage paper products. I used to have a huge stack of shopping bags, but sometimes I look at the pile and think....Prudy! What ARE you doing? So currently I only have a few shopping bags, but don't worry, I plan on shopping in the near future.
Back to the subject at hand. I don't want to spend hundreds of dollars for shopping bag's for show's.... So I decided to take my shopping bags.................
And my vintage newspapers, a glue stick and a marker, and make new label's for my old bags.
It was actually fun. I didn't like cutting up the vintage newspaper, but I figured it was just sitting in a bin in my closet, so I might as well use it!
I can tell you exactly what I bought that was in these bags. Is that bad? This is the most darling bag from a store in Hawaii called Cinnamon Girl. Summer shirt.
This bag was from Janie and Jack. When I was pregnant with Sophie I bought her a really yummy pink knit sweater. On the clearance rack of course.
Guess where that bag is from......
That was my retail therapy from Bare Escentuals. Blush and eye shadow.
White House Black Market. Really cute sandals with a bow across the front and wedge heels.
Nordstrom's. After going to IKEA with my sister we stopped to look at Clinique stuff and I walked out with this bag.
So you may not need shopping bags for customers, but you could do this for birthday's or Christmas too! Write whatever you like on the new label.
Come back and tell me what you make!
Friday, June 10, 2011
Food Friday~Key Lime
Does that look good or what??? I just got an e-mail from Betty Crocker the other day and it had a bunch of pictures of key lime desserts.... oh joy!! They all looked fabulous!! Search the words key lime on their site for the recipes.
This is the perfect summer dessert for a family get together or a picnic or heck I'll just make it for myself!
We are super busy with the move, packing and cleaning and touch up painting everyday! Making arrangements, getting paperwork, saying goodbye. The list is endless. I can't wait to share photos of the new house with you.
Remember my favorite paint color? Cotton Balls by Benjamin Moore? I painted the WHOLE upstairs that color!! I love it. Or rather I should say, we hired a painter to go out and paint. I was a little disappointed yesterday, I saw the marmoleum I picked for our laundry room on the floor at Cafe Yumm in Eugene. I still like it but for some reason I don't like having the same thing as a franchise. Oh well. At least I got to put a new floor in right?? Yes.
Ok, well back to work, much to do! I hope all of you have a great weekend!!
Friday, May 27, 2011
Food Friday~Super Fudge (it's healthy)
When I was in 4th and 5th grade my family lived in Arizona. During that time my mom had gone to a health food class. And our lives were instantly transformed, I mean that in a funny way....
We went from eating Doritos to wheat germ, from drinking pop to raw milk.
Now that I am older and know the benefits of that I really appreciate all my mom did. But I don't think we stuck with it very long. Probably to many complaints from the family, just like I hear.
And now you can't even get raw milk anywhere, it's illegal!! Which is ridiculous.
This recipe is from my mom's health food days. I have such fond memories of it, I'm not sure why, I do love it though. The original recipe calls for peanut butter, but since Sophie is allergic to peanuts I used almond butter. But it's better with peanut butter.
Super Fudge
1 C honey
1 C chunky peanut butter
1 C sunflower seeds
1/2 C raisins
3/4 C carob powder ( I used organic cocoa powder)
1 C sesame seeds (I used less)
1 C unsweetened coconut
Heat honey and peanut butter till smooth on low heat.
Quickly add rest of ingredients, which have already been mixed together.
Pour into greased 9x9 pan and chill.
Cut in pieces.
I adore this recipe, for many years I didn't have it and I searched my recipe files for it but could not find it. Then I wrote a letter to my grandma and asked her if she remembered this fudge and she had the recipe!!
Please pray for me, I am super duper stressed. I am grateful our farm is sold, but the stress is giving me migraine after migraine and I cannot function with them. We have to be out of the farm in 3 weeks and there is oh so much to do! And to top it off I have sick children. Portia was sick last weekend and Sophie this weekend. Sophie even got a trip to the ER. I'm not sure she really needed it but the nurse on the phone sounded very sure of herself when she told me to rush her to the ER even call an ambulance if I have to. Which scared me............. I am grateful that she cared, but now I have the ER bill. Oh well we would do anything for our children, wouldn't we? Yes.
She has a double ear infection, fever, maybe starting migraines, sore throat, and lets top it off with barfing, YES!!!
Well we must be thankful in the good times as well as the bad.
So thank you Jesus for all these things and for all you are doing behind the scenes that I cannot see. I am grateful I cannot see it all, because I may just go off the deep end if I did.
Amen.
and amen.
Friday, May 20, 2011
Food Friday~Chicken Spaghetti
hi, so sorry, this is late today, Portia stayed home from school with a fever, then I started cleaning and packing and well you know........
This is Pioneer Woman's recipe and it is really really yummy comfort food. As always I switched it up a bit and I'll let you know when I changed things.
Chicken Spaghetti
1 cut-up fryer chicken (I used 2 chicken breasts)
1 pound thin spaghetti, broken into 2 inch pieces
One 4 oz. jar diced pimientos, drained (eewww, left out)
1 small onion
1/4 C finely diced green bell pepper (I only had red, so used that)
2 cans cream of mushroom soup (eeewww again, I used cr. of chicken)
2 1/2 C grated cheddar cheese
1 t seasoned salt
freshly ground black pepper to taste
1/8 to 1/4 t cayenne pepper to taste
Preheat oven to 350.
Add the chicken to a stock pot. Cover with water and bring to a boil. Reduce the heat to medium and simmer until the chicken is cooked, about 25 minutes.
Remove the chicken from the water using tongs or a slotted spoon and set it aside on a plate to cool.
Remove 2 cups of broth from the pot and set aside.
Bring the remaining broth back to a boil and add the spaghetti. Cook al dente. (ok, I tried this but for some reason the remaining broth bubbled over before I even put the spaghetti in, and then it wasn't enough, so I had to keep adding more water cuz 1 pound of broken up spaghetti is alot.)
Drain the spaghetti, discarding the cooking liquid. Set aside.
Shred chicken or cut in chunks. Drain the pimientos.
Dice the onion and pepper.
Place cooked spaghetti in a large bowl. Add the cream soups, add 2 cups of the cheese.
Then add onion and pepper and pimiento.
Add the salt, black pepper, and cayenne pepper. Use less cayenne if you don't like the heat.
Add chicken broth that was saved. Stir together well, then taste to check seasonings.
Pour the mixture into a large baking pan, and top with the remaining cheddar. Bake for about 35 minutes until bubbly.
So if you like this you should just go buy her cookbook, cuz I have loved everything I've made so far!
This is Pioneer Woman's recipe and it is really really yummy comfort food. As always I switched it up a bit and I'll let you know when I changed things.
Chicken Spaghetti
1 cut-up fryer chicken (I used 2 chicken breasts)
1 pound thin spaghetti, broken into 2 inch pieces
One 4 oz. jar diced pimientos, drained (eewww, left out)
1 small onion
1/4 C finely diced green bell pepper (I only had red, so used that)
2 cans cream of mushroom soup (eeewww again, I used cr. of chicken)
2 1/2 C grated cheddar cheese
1 t seasoned salt
freshly ground black pepper to taste
1/8 to 1/4 t cayenne pepper to taste
Preheat oven to 350.
Add the chicken to a stock pot. Cover with water and bring to a boil. Reduce the heat to medium and simmer until the chicken is cooked, about 25 minutes.
Remove the chicken from the water using tongs or a slotted spoon and set it aside on a plate to cool.
Remove 2 cups of broth from the pot and set aside.
Bring the remaining broth back to a boil and add the spaghetti. Cook al dente. (ok, I tried this but for some reason the remaining broth bubbled over before I even put the spaghetti in, and then it wasn't enough, so I had to keep adding more water cuz 1 pound of broken up spaghetti is alot.)
Drain the spaghetti, discarding the cooking liquid. Set aside.
Shred chicken or cut in chunks. Drain the pimientos.
Dice the onion and pepper.
Place cooked spaghetti in a large bowl. Add the cream soups, add 2 cups of the cheese.
Then add onion and pepper and pimiento.
Add the salt, black pepper, and cayenne pepper. Use less cayenne if you don't like the heat.
Add chicken broth that was saved. Stir together well, then taste to check seasonings.
Pour the mixture into a large baking pan, and top with the remaining cheddar. Bake for about 35 minutes until bubbly.
So if you like this you should just go buy her cookbook, cuz I have loved everything I've made so far!
Friday, May 6, 2011
Food Friday~Salmon Burger
So I have not actually tried this recipe I am sharing today. I just got my new issue of Coastal Living magazine and a recipe for salmon burgers was in it. I just thought it looked so yummy, but this is not the actual photo of Coastal Livings salmon burger either.
Salmon Burger
1- 14.75 oz. can salmon, drained
1/4 C sliced green onion
1/4 C diced pimientos, drained ummm, yuck, won't be using those
1/2 t lime zest
2 T fresh lime juice
2 t dijon mustard
1/2 C plain greek-style yogurt
1/2 C panko (japanese breadcrumbs)
1/4 t salt
1/4 t freshly ground black pepper
1 large egg, lightly beaten
1 T vegetable oil, I'll use coconut oil
4 whole wheat or poppy seed buns
garnishes: lettuce, tomato slices, onion slices, cucumber slices
Combine first 11 ingredients in a bowl, and form mixture into 4 large patties about 1/2 in. thick. Patties will be soft.
Heat oil in a nonstick skillet over medium heat. Add patties, and cook 5 minutes on each side. Serve on buns; garnish, if desired. Makes 4 servings.
So either you guys never try my recipes or you don't like them or you never come back and give me feedback. COME ON GIRLS!!! Let me know how you like it!
Friday, April 29, 2011
Food Friday~Rainbow Ribbon
When I was little I used to look at my mom's cookbooks and there would always be a Jello one. I would beg my mom to make a Jello dessert. They all looked so fun and I thought if only I could eat those creamy lemon cups right out of the lemon or drink that Jello shake, I would be so happy!
The pictures were so MAGICAL!
Well I think I understand now why my mom rarely if ever made Jello desserts, at least the complicated ones. I made this recipe last fall or maybe it was before Christmas. It was difficult only because I had never made it before and I didn't know exactly how long to let it set or firm in the fridge before each additional layer, you know it never is as simple as the recipe says.
That being said, it was super fun to look at and super fun to eat. Just as I imagined as a kid.
And I hope my kids thought it was magical too.
Rainbow Ribbon
5 pkg (4 serving size) Jello gelatin dessert, any 5 different flavors
6 1/4 C boiling water
1 C sour cream, plain yogurt, or vanilla ice cream (I used yogurt)
Dissolve 1 pkg Jello in 1 1/4 C of the boiling water.
Pour 3/4 C of the Jello into 8 C ring mold. Chill until set but not firm.
Another side note, my mold was to wide, I needed to use a taller thinner mold to achieve the tall mold, but as you can see mine is quite shallow.
Chill remaining Jello in bowl until slightly thickened; gradually blend in 3 T of yogurt. Spoon over gelatin in mold. Chill until set but not firm, about 20-25 min.
Repeat with remaining Jello flavors.
Chill until firm, about 4 hours or overnight.
To unmold, dip mold in warm water for about 10 seconds. Gently pull gelatin from around edges with moist finger. Place moistened serving plate on top of mold. Invert mold and plate; holding mold and plate together, shake slightly to loosen. Gently remove mold and center gelatin on plate.
Ahhh if only it were that easy!!
It was very good! As you can see mine was not as tall and perfect as the cover photo!
Well I'm not a professional.
I am going to try more recipes from here........... someday, maybe.
Friday, April 15, 2011
Food Friday~Chocolate Cupcakes with Coffee Buttercream
So here is the recipe I promised, it is a Paula Deen recipe. If I had to make it over I would not add the cream filling. But I will give you the whole recipe and you can decide. They are addicting!
Chocolate Cupcakes with Coffee Cream Filling & Coffee Buttercream Frosting
2 1/4 C all purpose flour
2 C sugar
3/4 C unsweetened cocoa powder
1 1/2 t baking soda
1 t baking powder
1/2 t salt
1 C vegetable oil
1 C strong brewed coffee, cooled, I used instant~ easy
3 large eggs
1 8oz. container sour cream
1 t vanilla extract
Coffee cream filling, recipe follows
Coffee Buttercream, recipe follows
Preheat the oven to 350. Line muffin pans with paper liners and set aside.
In a large bowl, whisk flour, sugar, cocoa powder, baking soda, baking powder, and salt. Add oil, coffee, and eggs. Beat at medium speed with an electric mixer until smooth. Mix in the sour cream and vanilla.
Spoon the batter evenly into prepared muffin cups, filling each 2/3 full. Bake until a tester inserted in center comes out clean, for 16-18 minutes. Let them cool in pans on wire racks for 5 minutes. Remove from the pans and cool completely on wire racks.
Spoon coffee cream filling into a squeeze bottle with a long narrow tip. Insert the tip into the top of cupcake and squeeze about 1 T of filling into center of each cupcake.
OKAY....WHOAH Paula Deen. Not so quick and simple. I didn't have a bottle like this, I used this:
And that didn't work to well, for some reason my nozzle kept getting clogged, maybe it was to small and it was very hard to squeeze out, and after I thought I had been squeezing half the tube in, I still had no way of telling how much was in there, except to break the cupcake in half and see for myself. Of course I had to eat those test cakes. (I made this a couple months ago before I started, my grain/sugar free diet).
Spread the coffee buttercream frosting evenly over the cupcakes and garnish with chocolate covered coffee beans, if desired. That would have been good, but I didn't have any chocolate covered coffee beans, and I found that these cupcakes and the coffee frosting were pretty coffee flavored, which I love, but the bean would have been to much.
Coffee Cream Filling
1 (3 oz.) package of cream cheese, softened
1/4 C coffee flavored liqueur, ok I didn't have this and don't remember what I replaced it with!
1 (8 oz.) container frozen chocolate flavored whipped topping, thawed. I had regular flavored cool whip and squirted some chocolate syrup in it.
In a small bowl, whip the cream cheese at medium speed with an electric mixer until smooth. Slowly add the liqueur and fold in whipped topping. Cover and chill.
Coffee Buttercream Frosting
1/2 C butter, softened
3 C confectioners sugar
1/4 C strong brewed coffee, I used instant again.
In a medium bowl, beat the butter at medium speed with an electric mixer until creamy. Gradually add the confectioners sugar, beating until smooth, then beat in coffee. I think I added more confectioner sugar to make mine thicker.
These are extremely delicious and would be still amazing without the cream filling.
Subscribe to:
Posts (Atom)